Objectives
- How might we make the Reverb concept and the parameters of adding more/less reverb understandable?
- How might we design the interactions so that it’ll be accessible for guests?
- How might we present reverb tools in the VR space without specific knobs and wording cues?
The design goal for this prototype is to create:
- Reverb visualization in VR
- Wet / Dry adjustment interaction
Inspiration
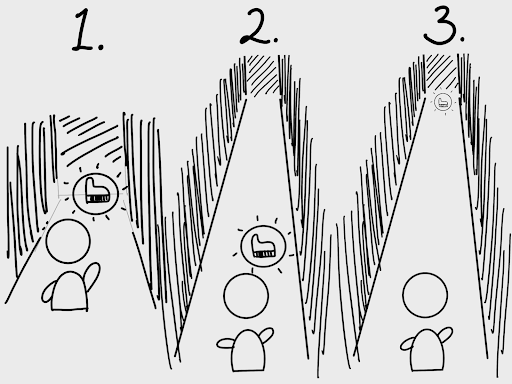
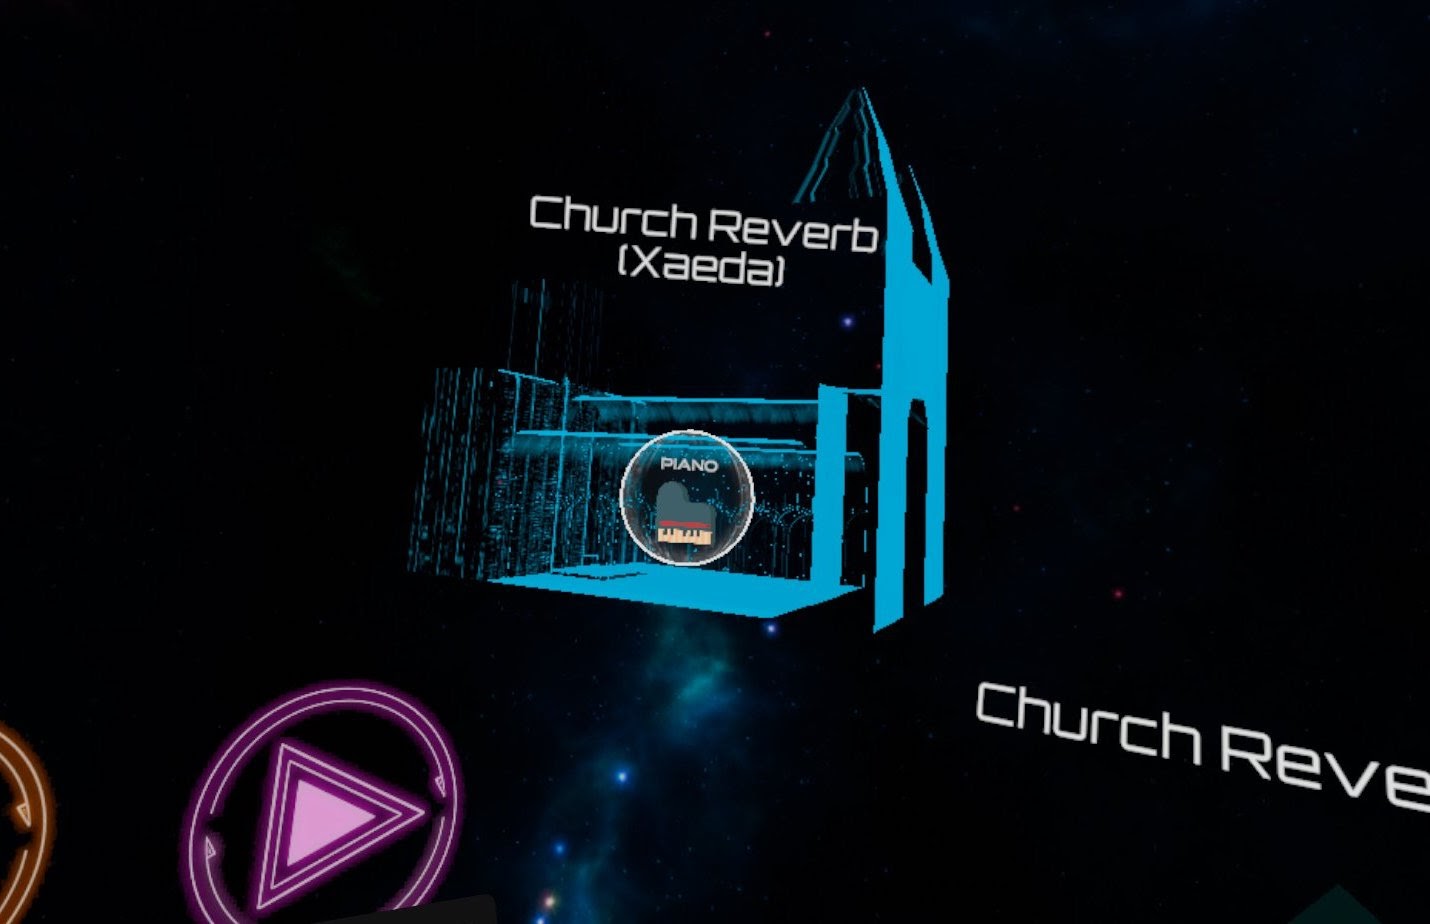
The initial concept while pitching the project was to visualize a church reverb by placing a 3D church model on top of a sound track. This was done to replicate the action of using a DAW to ‘apply’ a reverb plugin in an FX chain (church space reverb in this case).
By scaling the church model, the reverb effect would be adjusted so that the sound track would change according to the size of the room. The insights obtained from industry professionals also align with our vision: To bring real-world materials into the virtual space to build obvious association with abstract concepts, such as reverb. Therefore, we decided to take the concept into the next level: put the guests into a space and enable them to scale it.
Being in the space while it changes its form connects the abstract reverb concept with the sound difference.
Design Specifications
Here’s a demo of the prototype on the track field layout, tracks, basic control functions, and volume/panning:
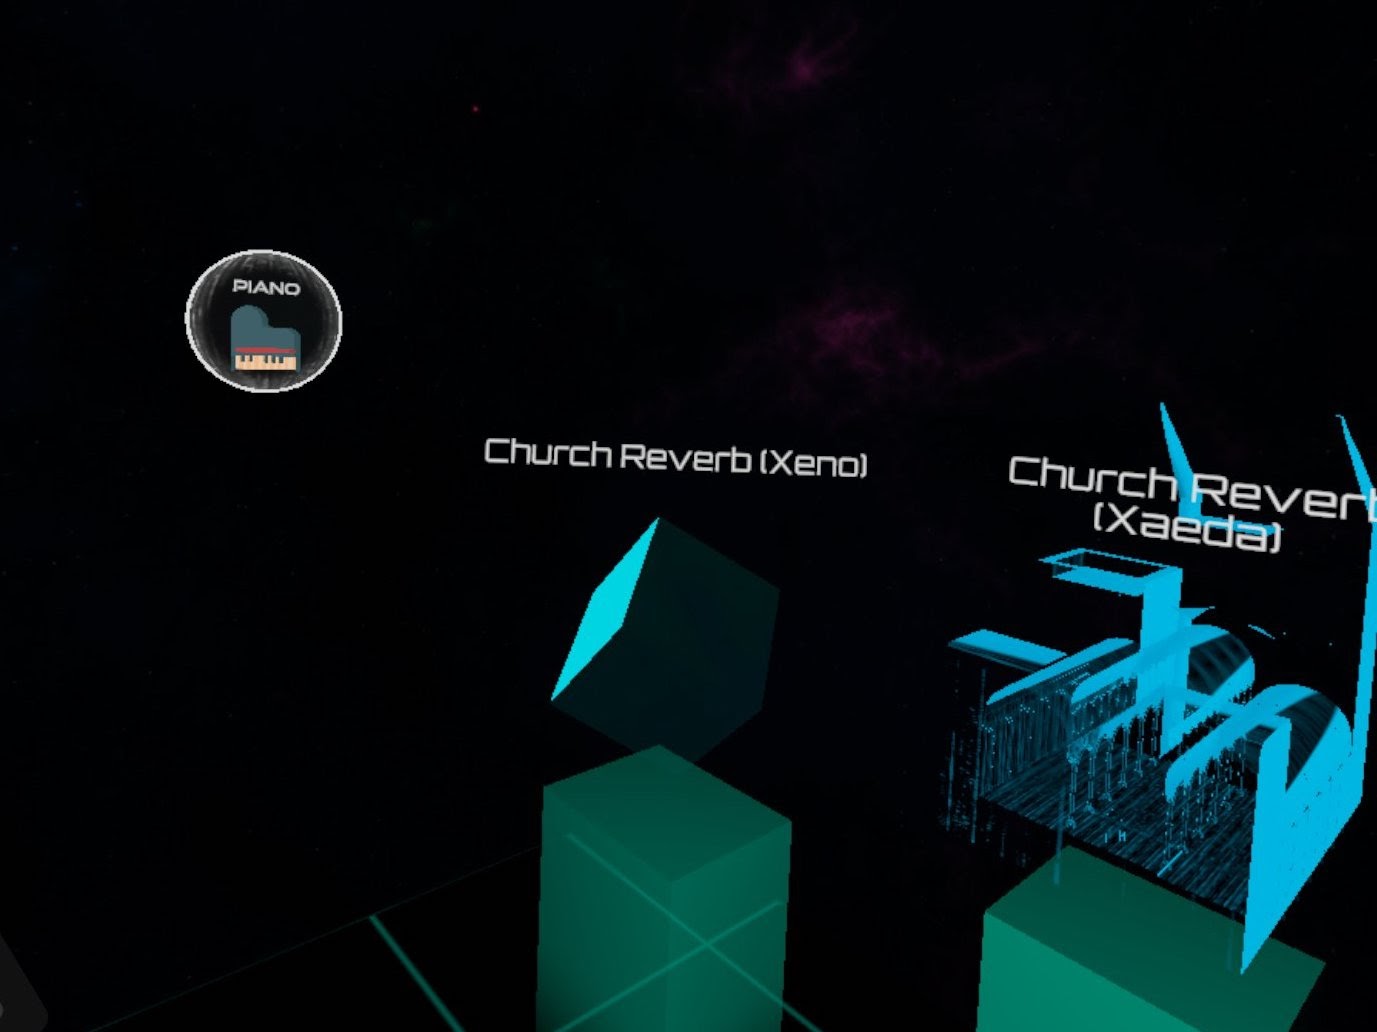
Guests can pick up a tool from the pillar by holding down the Grip button while hovering.
- When grabbed, the tool will snap to the hand, and the pointer on the controller disappears.
- When placed on the orb, the tool will snap onto the orb, and the corresponding effect will be applied to the orb.
If guests release the grip button while it’s not on the orb, the tool will be reset back to the pillar (same goes for removing the tool from an orb).
-
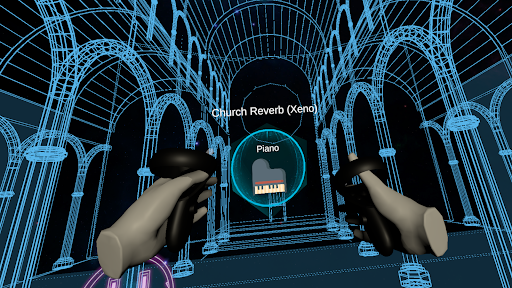
- After the cube snaps onto the orb, the hallway emerges from the ground. Reverb editing mode begins.
- Dry ratio: moving arms back and forth while holding down Trigger on one controller to move the orb closer/further from the guest down the hallway.
-
- After the church model snaps onto the orb, reverb gets applied to the track.
- Dry level: adjust the opacity of the orb by pressing Trigger on the left controller:
- Increase the opacity by raising the left controller up, decrease the opacity by lowering the left controller toward the floor.
- The opacity of the orb will affect the dry level of the track.
- Wet level: adjust the opacity of the church by pressing Trigger on the right controller:
- Increase the opacity by raising the right controller up, decrease the opacity by lowering the right controller toward the floor.
- The opacity of the church will affect the wet level of the track.
Tech Setup
The audio implementation for these prototypes were pretty straightforward. As decided to make this a standalone prototype, the transitioning from the track field to the reverb view wasn’t a problem anymore.
Nevertheless the main TrackFMODManager script we modified to support adding Reverb as a plugin onto the track group. Ideally in a DAW you either have the option to add it onto any instrument/audio channel or add a Reverb plugin onto an auxiliary track when then can be used as a bus that we can send signals into from our source tracks. The script was set up in such a way that reverb plugin can be added to each track like the first method mentioned above.
There were two types of Reverb plugins that we could make use of from FMOD:
- Convolution Reverb.
- Algorithmic Reverb (simply “Reverb” in the FMOD interface).
The advantage of using Convolution reverb is that you can use an impulse-response (usually an audio .wav file) that simulates exactly how the particular space should sound like. There were two disadvantages to using this:
- Since we wanted to use an exaggerated/big space like the “Church” , it was difficult to find a license free impulse-response file and it was also hard to go and record one.
- The FMOD Convolution Plugin didn’t support changing any other parameter apart from just adjusting the dryness/wetness of the source signal.
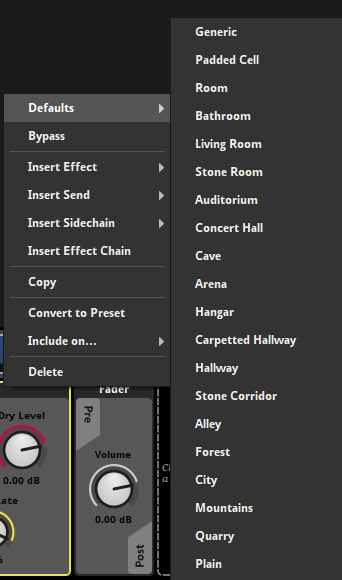
The reverb plugin came with a bunch of presets that was usable right off the bat.
These presets just had some predefined values for the existing knobs and all the parameters exposed could be scripting from C# through the FMOD API.
The ones of interest to us were the “Concert Hall”, “Cave” and “Hallway” . These presets had some really large-space sounding effects. We chose the “Concert Hall” preset which had really high diffusion and considerably large reverb time. This was close enough to simulate a Church like space for our prototype.
Another advantage to using this plugin was that the prototypes could be extended to support any of these preset spaces that the plugin supported without too much change in code and setup.
Playtest Results
Playtest statistics:



- Interactions, scaling hallway / dragging the orb / moving the controller up and down while holding down the trigger to adjust opacity of the church model and the orb, were easy to perform.
- Putting reverb as a tool on one of the pillars → most guests know they have to grab one and “apply” it on the orb.
Xeno:
- Scaling church gives good immersion, leading to good understanding of reverb.
- Being in the “church” creates a good environment to learn church reverb.
- Dragging orb (dry level) can be more obvious →
- Knowing Quest can not perform sound very well.
- Non-musicians were not able to figure out what to do with the orb without reading instruction first because they might not know there are different parameters to adjust in reverb.
Xaeda:
- Changing the opacity of the church model to change reverb was noticeable.
- The feedback of applying the church model onto the orb was not obvious.
- Changing the opacity of the orb did not sound obvious if the wet level (church opacity) was high.
- Bringing the control panel closer to the guest / make the selecting light beam longer may help with the guest experience. Buttons are out of reach (outside of the stationary area), and guests are unaware that they can go over the borders to touch & select the buttons.
Insights From Professionals
- To create a space/tail for multiple sounds to feel as if all of them are coming from the same space: The recommended way of doing this is to create a “Bus”/”Auxiliary” track that has the Reverb applied on it and send some of the all the instruments to the bus.
- To sometimes match the space/tail of recordings or for other creative use: The recommended way of doing this is to apply the Reverb plugin directly on the FX chain on the track’s channel.
The way we designed the interface behaved more like the 2nd way where the guest could “Apply” the Reverb plugin onto the track and under the hood we were adding the plugin to the FX chain. That said, our visualisation naturally leaned towards the use case of the 1st way as per their comments and it certainly helps understand what the effect of Reverb actually does to a sound. It was fascinating to understand how a small change in the interface could naturally lead to understanding of a particular technique and in-turn drive the guest to understand the concept much faster.
Lessons learned
Xeno is easier for novice musicians to get a grasp on reverb because the prototype brings up the church reverb space so that the guests can see and feel the sound more immersively. However, guests could not identify the parameters when scaling the hallway (wet) and dragging the orb (dry). Additionally, we could not precisely gauge the level of guests’ understanding toward “reverb time”, “diffusion”, “wet/dry level”. Therefore, guests seemed to interpret the meaning of these parameters by looking at the definition we provided in the survey. They seemed to not fully comprehend what the values that they were adjusting were changing. The different interpretation of each parameter led to the results of guests muddled up diffusion with wet/dry level.
Overall, the playtesters understood the concept of reverb and heard the sound difference while altering the space.
Xaeda is more abstract. It was not only hard for non-musicians to understand, but novices had a hard time understanding the connection between opacity and reverb. They might be able to hear the sound change, however, compared to Xeno, Xaeda is apparently less immersive and demands more layers of thinking. Compared to Xeno, Xaeda’s abstract qualities took away from the intuitiveness and immersion of Xeno, which demands more layers of thinking.
Future Considerations
- Onboarding tutorials that are built within the VR space about interactions and the correlating parameters can prevent miscommunication and lower the threshold of the prototype.
- The whole interaction of “Applying Reverb on a Track” can be effectively extended to any effect/plugin that FMOD could support ( Ex: Delay, Compression etc ) and become a common mechanism for adding a plugin to the FX Chain of the track.
- Capability of addition of multiple tracks simultaneously within a reverb space (like in Xeno), while having a Bus handle the Reverb in the background can add to the understanding of the usage of Reverb.
