Objectives
- How could we simplify the steps of automating a track?
- How could we incorporate timeline into the space?
- How could design in a way that shows all interactions between tracks while automation is happening?
- How could we draw a connection between audio automation and animation curves/keyframes to help newcomers understand the concept?
The design goal for this prototype is to create:
- Automation visualization in VR.
- Automation curve
- Automation recording interaction.
- Timeline representation that allows guests to jump to any point of the song.
Inspiration
- Automation can be complicated and time consuming due to the amount of steps.
- Visualizing all track changes can be powerful.
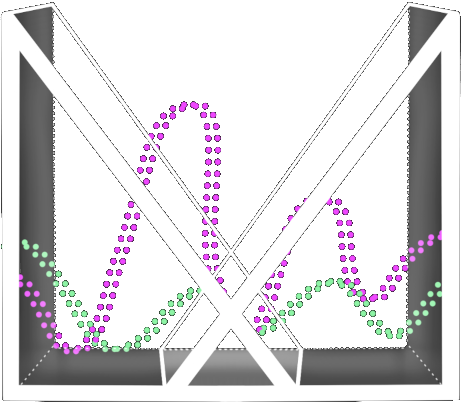
Therefore, we explore simplifying the process of automation by drawing volume + panning automation curve at the same time with one single interaction. Trackfield sets up a good environment for perceiving all track/orb interactions. Additionally, we want to explore the vertical space (height) because the Reverb Xeno prototype successfully proved the increased efficiency and immersiveness of using the bigger VR space. Thus, instead of clustering automation curves horizontally on the trackfield, we try to design the curve vertically.
Design Specifications
Here’s a demo of the prototype on the track field layout, tracks, basic control functions, and volume/panning:
Implement automation in the prototype to allow guests to:
- See how tracks are moving given a pre-mixed song
- Create their own automation.
- There is a curve in front of the track field that serves as a timeline.
- The timeline shows the current progress of the song (with time stamps).
- By clicking on a point on the timeline, guests should be able to play back the song from that point.
- Guests can create their own automation by dragging the orb while holding down both the Grip and the Trigger:
- When creating the automation, the selected orb will turn colorful from white, and will leave a trail in its own color as it moves on the track field.
- Once the automation is created, the trail slowly falls from the sky as the keyframes reach the current play time.
Guests can erase the automation date by pressing the A/X button while hovering on the orb.
Tech Setup
In order to get the Automation to work, we had to implement a simple timeline scrubbing functionality since Automation is a time based tool.
Timeline Setup :
Getting the timeline position for one single event was straightforward and on top of that FMOD also supports beat-event callbacks (that can be very helpful for rhythm games) but our use case was slightly different. Since all the events were triggered at the same time (re: all tracks are stems of equal length), we needed a way to position all the events at the same point in time when the “Timeline Head” is moved around. We relied on this fact and used one “Master” event (something that we assigned in the Unity editor) to inform the script in Unity what the time in milliseconds is at the current update frame.
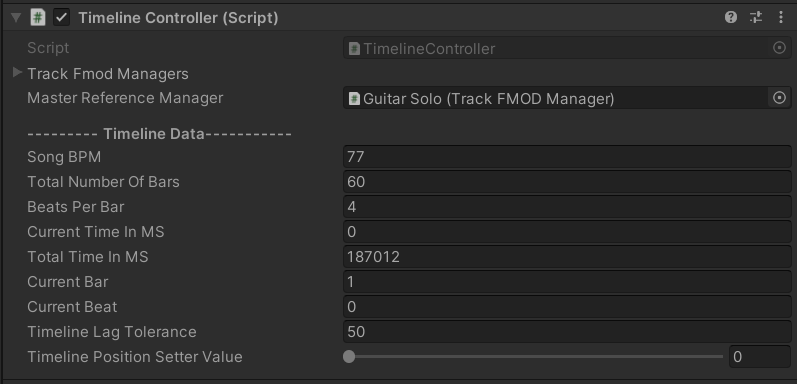
One extra information that had to be fed in and set up at the time of loading these tracks from FMOD was about the total number of measures and the Beat Per Minute (BPM) the song is exported at, and what the beats/bar (time signature) is for the track. This information was then used to decide the speed at which the timeline head is going to move. Here is a glimpse of what the TimelineController parameters looked like in Unity.
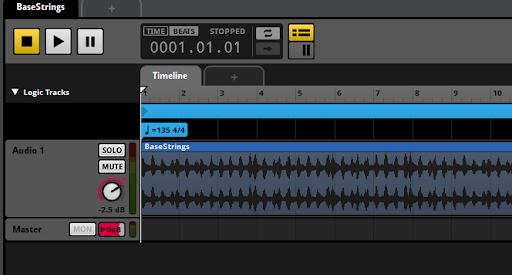
Back in FMOD, we also fed in the information for easy maintenance of tracks. We used the “Add Tempo Marker” functionality to store this:
Automation Setup:
Once the timeline was setup and implemented in Unity, the call was to decide how to implement the actual “Automation”
The idea to use Track Field as the foundation meant having the ability to store the automation information ( fv/p(time) := value ) for both volume and panning. The thought of using FMOD itself as the storage container was ruled out since writing out the automation data to FMOD through it’s API was difficult.
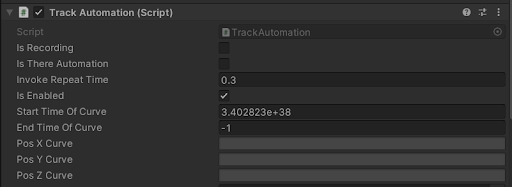
Animation Curve was the answer to this problem. Since the mapping of world position to the Volume and Panning was already achieved in a previous prototype, the only thing left was to store this world position data in the curve over time and in turn use that to playback when guests record and playback the animation. Each track in Unity has extra information and 3 Unity Animation Curves that store the (x,y,z) world position vector.
Once the guest presses the “record button”, the keyframes, or rather the stars of the constellation, are created and stored in the Animation Curve for that track and if the track has keys, it follows how the curve defines it.
Playtest Results
Playtest statistics:


Results:
- Visualization: Using constellations as an automation curve is fascinating.
- Visualization: Visualization was clear and easy to understand, and can associate the constellation with the automation curve.
- Visualization: Constellation was hard to notice while looking at the trackfield. When playing back the recording, the constellation falls into eyesight 1-2 seconds before automation begins.
- Interface: Undo/delete automation button was not labeled or listed in the instructions.
- Interface: Automation recording has no indication or UI feedback, resulting in playtesters being unsure about whether the automation has been captured or not.
- Interaction: Automation function was easy to understand and operate for all playtesters.
- Interaction: Hard to perform “fine-tune” adjustments because hand drawing the curve may jitter.
- Interaction: Automating 2 parameters (volume & panning) all at once can be convenient, but also challenging to adjust only one parameter.
- Interaction: Hard to focus on the timeline while looking in the trackfield where you are creating motion automation.
Insights From Professionals
Some thoughts the industry professionals had after experiencing/seeing this prototype:
- Doing automation in VR was a more fun experience and watching it turned into 3D constellations that descend towards guests was really rewarding! Unlike a DAW where you need to “arm” an automation track, the 2 buttons on the controller allows you to jump around and do automation on different tracks. That was smooth and intuitive and a great deal more fun as well.
- It’s easier but less fun in a DAW to do Automation because you usually only record automation of a single parameter (like volume). This means you are giving sole focus to listening and automating 1 audio parameter at a time. In this VR demo you are automating both pan and volume at the same time which is a bit harder to do if your intention is to only be automating on a single axis.
- The current design of using the track field and automation requires too much looking around and searching for buttons.
Lessons learned
As we tried to simplify the process and interaction of automation, it also challenged guests to perform fine-tune adjustments.
Although VR prompts us to make full use of all the space, having a fixed platform in front of the guest view locks the vision to a certain area most of the time. Therefore, it can be overwhelming for guests to focus on the trackfield while creating automation at the right timing. Also hard to track automation curves (constellations) falling down from above while playbacks. However, visualizing the automation curve as a constellation fit perfectly with the environment and also got plenty of astonishments from the guests when they see it and understand what it represents.
Future Considerations
- Having more visual cues when recording begins and before the constellation (automation curve) falls down.
- Toggle between automating both volume & panning parameters or only one parameter at a time.
